More languages
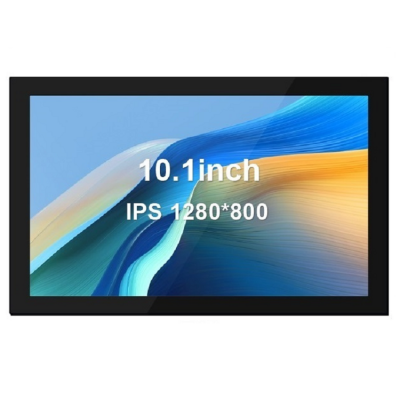
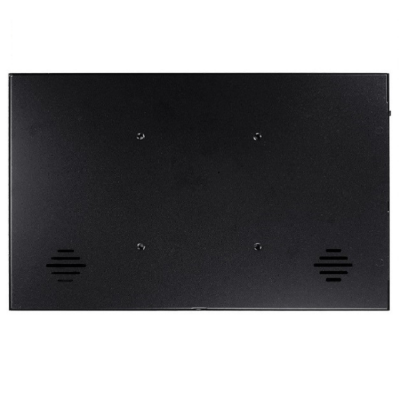
Product Images
Product Features
- Built-in Housing
- ○ The product adopts an integrated die-cast housing (made of iron) with a full-wrapped design.
- 10.1-inch IPS Full-view Display Screen
- ○ Large viewing angle.
- ○ True-to-life colors.
- ○ Excellent image quality.
- 1280X800 Resolution
- ○ High-definition view.
- ○ Very delicate display.
- ○ Through software settings, the resolution can be upgraded to 1920X1080.
- New Touch Panel
- ○ Covered with tempered glass.
- ○ The hardness reaches 6H, which is scratch-resistant and durable.
- High-sensitivity Capacitive Touch Screen
- ○ Accurate touch.
- ○ Supports up to 5-point touch at most.
- HDMI and VGA Video Input Interfaces
- ○ High-definition video display.
- Audio Output
- ○ Stereo dual-speaker output with stunning sound quality.
- ○ 3.5mm audio output interface.
- Multifunctional Rotary Switch
- ○ Supports brightness and volume adjustment.
- ○ Supports menu settings.
- ○ Supports HDMI/VGA video signal switching.
- Supports Multiple Device Connections
- ○ Can be connected to mainstream development boards such as Raspberry Pi, Banana Pi, and BB Black.
- ○ Can be connected to mainstream game consoles such as PS4, Xbox360, and Switch.
- ○ Can be connected to mainstream TV boxes and digital cameras (for display only).
- Supports Multiple System Displays
- ○ Supports systems such as Raspbian, Kali linux, Ubuntu, Kodi, and Win10 IOT, and the touch function is driver-free.
- ○ Supports systems such as Win7/8/10/11, and the touch function is driver-free.
- Certified by CE and RoHS
Product Description
Product Parameters
| Name | Parameters |
|---|---|
| SKU | MPI1009 |
| Display Screen Type | IPS screen |
| Display Screen Size | 10.1 inch |
| Resolution | 1280 x 800(RGB) (pixels) |
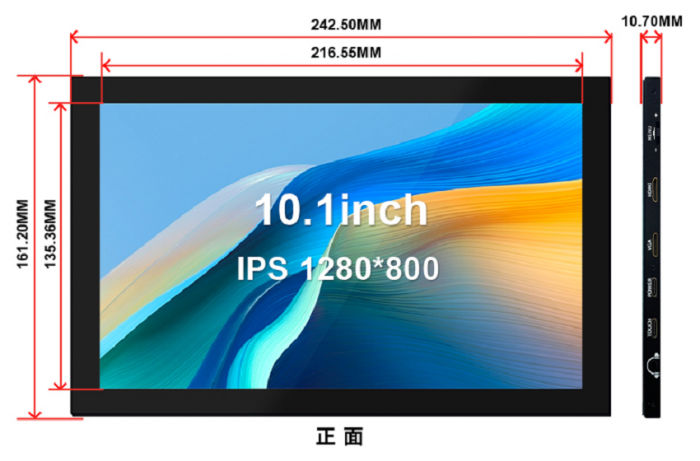
| Display Area | 216.55(W) x 135.36(H) (mm) |
| Maximum Supported Color Number | 16.7M |
| Pixel Size | 0.1692 x 0.1692 (mm) |
| Viewing Angle | ALL 0’ CLOCK |
| Brightness (Typical Value) | 250 cd/m2 |
| Contrast Ratio (Typical Value) | 1000 |
| Backlight Type | White LED lights |
| Backlight Current (Typical Value) | 180mA |
| Operating Temperature | -10~50(℃) |
| Storage Temperature | -20~60(℃) |
| Backlight Adjustment | Adjusted by the rotary switch. |
| Volume Adjustment | Adjusted by the rotary switch. |
| Touch Screen Type | Capacitive touch screen |
| Touch IC | GT911 |
| Touch Screen Size | 241.30(W) x 160.00(H) (mm) |
| Touch Screen Viewing Area | 217.34(W) x 136.00(H) (mm) |
| Power Supply Voltage | 5V |
| Speaker Power | 8Ω 2W x 2 |
| Overall Module Power | 6.15W (100% brightness, 0% volume), 9W(100% brightness, 100% volume) |
| Video Input Interface | Mini HDMI & VGA |
| Audio Output Interface | 3.5mm audio interface + stereo dual-speaker output |
| Power Interface | Type-C |
| Touch Output Interface | Type-C |
| Module Dimensions (Length x Width x Height) | 242.50(W) x 161.20(H) x 10.70(T)(mm) |
| Packaging Dimensions (Length x Width x Height) | 295(W) x 195(H) x 70(T) (mm) |
| Product Weight (Including Packaging) | 938(g) |
Instructions for Buttons and Interface Functions
| Buttons and Interfaces | Instructions |
|---|---|
| DISPLAY | HDMI signal input interface.
Use a Mini HDMI cable for connection, which is commonly used to connect to a computer. The maximum supported resolution is 1920x1080. |
| VGA | VGA signal input interface. Use a Mini HDMI male-to-VGA female adapter cable for connection. |
| POWER | Power input interface. Use a Type-C cable for connection, which only has a power supply function and no touch function. |
| TOUCH | Touch signal input interface. Use a Type-C cable for connection, which provides both power supply and touch functions. |
| Headphone | 3.5mm audio output interface, which can be connected to audio devices such as headphones or speakers. |
| MENU | Brightness Adjustment:
When there is no setting interface displayed, turn the rotary switch upward to trigger the brightness setting function. After triggering, turn the switch up and down to adjust the brightness value. After the adjustment is completed, press the switch briefly to exit or wait for 10 seconds to exit automatically. |
| Volume Adjustment:
When there is no setting interface displayed, turn the rotary switch downward to trigger the volume setting function. After triggering, turn the switch up and down to adjust the volume value. After the adjustment is completed, press the switch briefly to exit or wait for 10 seconds to exit automatically. | |
| Menu Settings:
When there is no setting interface displayed, press the rotary switch briefly to trigger the menu setting function. After triggering, enter the menu. Turn the switch up and down to select, press briefly to confirm, and press and hold to return or exit. | |
| Signal Switching:
When there is no setting interface displayed, press and hold the rotary switch to trigger the HDMI and VGA input signal switching function. |
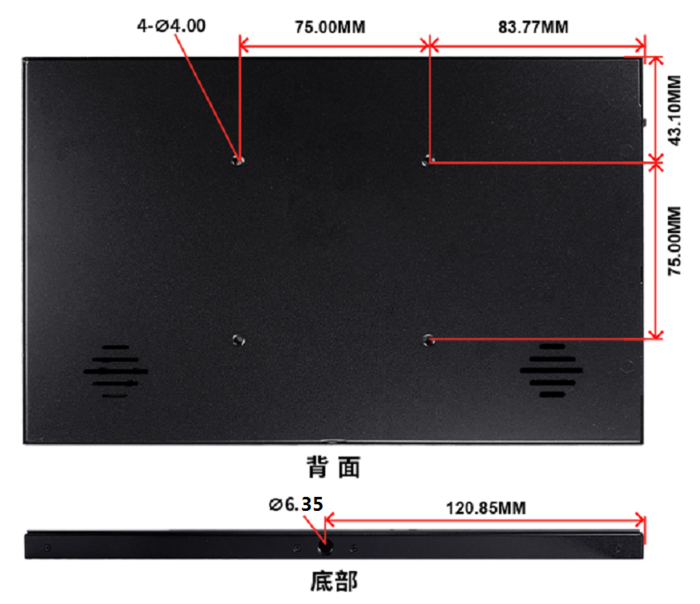
Product Dimensions
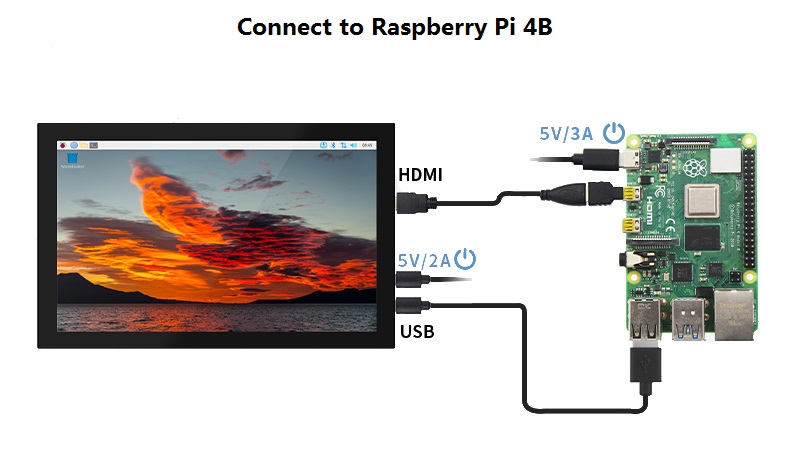
Connecting to Raspberry Pi
Using with Raspberry Pi
Step 1, Download the Latest Official Image
- 1)Download the official Raspbian image
- Download website: https://www.raspberrypi.org/downloads/raspbian/
- Username: pi Password: raspberry
- 2)Download the official Ubuntu Mate image
- Download website: https://ubuntu-mate.org/download/
- The username and password can be set by yourself after booting up.
- 3)Download the official Kail image
- Download website: https://www.offensive-security.com/kali-linux-arm-images/
- Username: kali Password: kali
- 4)Download the official Retropie image
- Download website: https://retropie.org.uk/download/
- Username: pi Password: raspberry
Step 2, Burn the Official Image
- 1)Download and install the tool software (If it has been installed, this step can be skipped)
- Download website for the SD card formatting software SDFormatter:
- https://www.sdcard.org/downloads/formatter_4/
- Download website for the image burning software Win32DiskImager:
- https://sourceforge.net/projects/win32diskimager/
- 2)Format the SD card
- Insert the SD card into the card reader -> Insert the card reader into the computer -> Open the SDFormatter software -> Select the SD card -> Select Quick format
- (Generally, select quick format, and other options can be selected according to your own needs) -> Click the Format button -> Select “Yes” -> Click OK after the formatting is completed.
- 3)Burn the image
- Open the Win32DiskImager software -> Select the image file to be burned (xxx.img) -> Select the SD card -> Click the “write” button ->
- Select “Yes” -> Wait for the burning to complete (The whole process takes about 10 minutes).
Step 3, Modify the “config.txt” Configuration File
- Open the “config.txt” file in the root directory of the SD card on the computer, and find the following content:
- dtoverlay=vc4-kms-v3d
- Change it to:
- dtoverlay=vc4-fkms-v3d
- After the modification is completed, add the following content to the end of the file, save it and exit.
max_usb_current=1
hdmi_force_hotplug=1
config_hdmi_boost=7
hdmi_group=2
hdmi_mode=1
hdmi_mode=87
hdmi_drive=2
hdmi_cvt 1280 800 60 6 0 0 0
Step 4, Insert the SD card
- After all the above steps are completed, eject the SD card on the computer, and then insert it into the SD card slot on the back of the Raspberry Pi.
Step 5, Run the System
- Connect the HDMI interface and the TOUCH interface of the display screen to the Raspberry Pi, connect the power supply of the Raspberry Pi and boot it up, then it can display and be touched normally.
Using as an HDMI Touch Monitor for a Computer
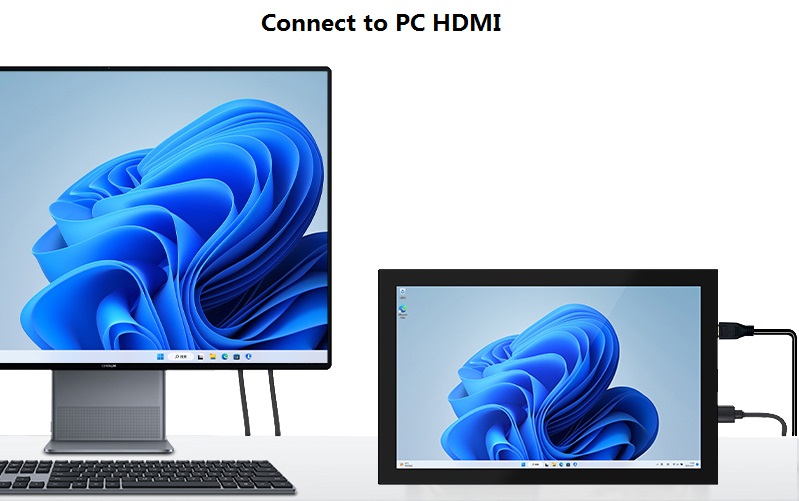
This product can be used as an HDMI touch monitor for a Windows computer. Just connect the HDMI interface and the TOUCH interface, and it can display normally and support up to five-point touch.
Connecting to Jetson Nano
Frequently Asked Questions
- Common Problems of Raspberry Pi
- How to Use Dual-screen Display in Raspberry Pi 4
- The Official 64-bit System of Raspberry Pi 2021-05-07-raspios-buster-arm64.img Cannot Set the Resolution
Resource Downloads
Documents
- 10.1inch-HDMI-Display-(S)-Datasheetl.pdf
- How_to_install_the_LCD_driver_V1.2
- How_to_install_matchbox-keyboard
- How_to_use_Raspberry_Pi(Download,Format,Burn,SSH,PuTTy)-V1.0.pdf
Driver Downloads
- Driver:LCD-show.tar.gz
Image Downloads
- If you find it difficult to modify the configuration and install the driver in the previous steps, or the display is still abnormal,
- Please first use our pre-installed driver image. After downloading, unzip it and write the image to the TF card. Then insert the card into the Raspberry Pi and it can be used.
| Image Name | Version | Support |
|---|---|---|
| Raspbian | 2024-10-22 | PI5/PI4/PI3B+/PI3/
PI2/ZERO/ZERO W |
| Ubuntu MATE | 22.04 | PI4,PI3B+,PI3,PI2 |
| Kali Linux RaspberryPi 2, 3 and 4 | 2021.2 | PI4B,PI3B+,PI3,PI2 |
| Image Name | Version | Download |
|---|---|---|
| Raspbian | 2024-11-19 | |
| Ubuntu MATE | 22.04 | |
| Kali Linux RaspberryPi 2, 3 and 4 | 2024.3 | |

