More actions
No edit summary |
|||
| Line 1: | Line 1: | ||
== <font color="blue">Product Video</font> == | == <font color="blue">Product Video</font> == | ||
{{#ev:youtube|5DAn_5-1Jg4}} | {{#ev:youtube|5DAn_5-1Jg4}} | ||
*[http://www.lcdwiki.com/Video_Presentation Related Video] | *[http://www.lcdwiki.com/Video_Presentation Related Video] | ||
== <font color="blue">Product Pictures</font>== | == <font color="blue">Product Pictures</font>== | ||
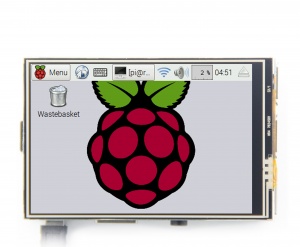
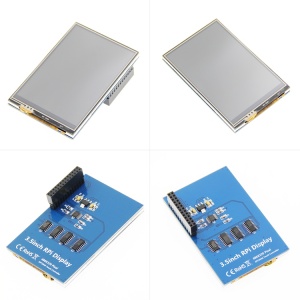
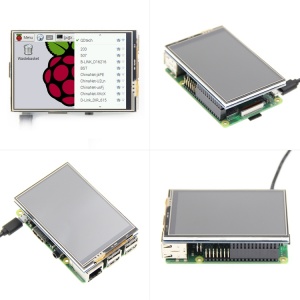
[[File:MPI3501-100-1.jpg|300px]] | [[File:MPI3501-100-1.jpg|300px]] | ||
| Line 71: | Line 72: | ||
|Power positive (5V power input) | |Power positive (5V power input) | ||
|- | |- | ||
|3, 5, 7, 8, 10 | |3, 5, 7, 8, 10, 13, 15, 16 | ||
|NC | |NC | ||
|NC | |NC | ||
| Line 82: | Line 83: | ||
|TP_IRQ | |TP_IRQ | ||
|Touch Panel interrupt, low level while the Touch Panel detects touching | |Touch Panel interrupt, low level while the Touch Panel detects touching | ||
|- | |||
|12 | |||
|BL_PWM | |||
|PWM to control backlight brightness | |||
|- | |- | ||
|18 | |18 | ||
| Line 111: | Line 116: | ||
|Touch Panel chip selection, low active | |Touch Panel chip selection, low active | ||
|} | |} | ||
| Line 126: | Line 130: | ||
'''Run:'''<br> | '''Run:'''<br> | ||
{{code|1= | {{code|1= | ||
git clone https://github.com/waveshare/LCD-show.git | |||
git clone https://github.com/ | |||
chmod -R 755 LCD-show | chmod -R 755 LCD-show | ||
cd LCD-show/ | cd LCD-show/ | ||
| Line 133: | Line 136: | ||
}} | }} | ||
Wait A Few Minutes, when the system reboot ok, you can see that.< | == Wait A Few Minutes, when the system reboot ok, you can see that. <font color="blue">Use PWM to control backlight brightness</font> == | ||
{{code|1= | |||
gpio -g pwm 18 1024 | |||
gpio -g mode 18 pwm | |||
gpio pwmc 1000 | |||
gpio -g pwm 18 X | |||
}} | |||
==<font color="blue">Touch screen calibration </font>== | ==<font color="blue">Touch screen calibration </font>== | ||
| Line 159: | Line 168: | ||
* '''Document''' | * '''Document''' | ||
# [http://www.lcdwiki.com/res/PublicFile/How_to_install_the_LCD_driver_V1.2.pdf How_to_install_the_LCD_driver_V1.2] | # [http://www.lcdwiki.com/res/PublicFile/How_to_install_the_LCD_driver_V1.2.pdf How_to_install_the_LCD_driver_V1.2] | ||
# [http://www.lcdwiki.com/res/PublicFile/How_to_install_matchbox-keyboard(En).pdf How_to_install_matchbox-keyboard] | # [http://www.lcdwiki.com/res/PublicFile/How_to_install_matchbox-keyboard(En).pdf How_to_install_matchbox-keyboard] | ||
| Line 217: | Line 227: | ||
|[https://mega.nz/#!nTQyjIZA!dHJXrXjhNqOUwlwtkGczhGoH7RYDYSQIlhHokW65Hnc 3.5inch-MPI3501-kali-linux-2018.2-rpi3B+-nexmon] | |[https://mega.nz/#!nTQyjIZA!dHJXrXjhNqOUwlwtkGczhGoH7RYDYSQIlhHokW65Hnc 3.5inch-MPI3501-kali-linux-2018.2-rpi3B+-nexmon] | ||
|} | |} | ||
*[http://www.lcdwiki.com/MD5 MD5 of Image] | *[http://www.lcdwiki.com/MD5 MD5 of Image] | ||
* '''Software''' | * '''Software''' | ||
Revision as of 11:04, 14 May 2019
Product Video
Product Pictures
Features
- 320×480 resolution
- Resistive touch control
- Supports any revision of Raspberry Pi (directly-pluggable)
- Compatible with Raspberry Pi A, B, A+, B+, 2B, 3B, 3B+versions
- Drivers provided (works with your own Raspbian/Ubuntu directly)
- Size perfectly fits the Pi
- High quality immersion gold surface plating
- Supports Raspbian system, ubuntu system ,kali Linux system
Key Parameters
| SKU | MPI3501 |
| LCD Type | TFT |
| LCD Interface | SPI(Fmax:32MHz) |
| Touch Screen Type | Resistive |
| Touch Screen Controller | XPT2046 |
| Colors | 65536 |
| Backlight | LED |
| Resolution | 320*480 (Pixel) |
| Backlight Current | 120ma |
| Power Dissipation | 0.13A*5V |
| Operating Temp. (℃) | -20~70 |
Interface
| PIN NO. | SYMBOL | DESCRIPTION |
|---|---|---|
| 1, 17 | 3.3V | Power positive (3.3V power input) |
| 2, 4 | 5V | Power positive (5V power input) |
| 3, 5, 7, 8, 10, 13, 15, 16 | NC | NC |
| 6, 9, 14, 20, 25 | GND | Ground |
| 11 | TP_IRQ | Touch Panel interrupt, low level while the Touch Panel detects touching |
| 12 | BL_PWM | PWM to control backlight brightness |
| 18 | LCD_RS | Instruction/Data Register selection |
| 19 | LCD_SI / TP_SI | SPI data input of LCD/Touch Panel |
| 21 | TP_SO | SPI data output of Touch Panel |
| 22 | RST | Reset |
| 23 | LCD_SCK / TP_SCK | SPI clock of LCD/Touch Panel |
| 24 | LCD_CS | LCD chip selection, low active |
| 26 | TP_CS | Touch Panel chip selection, low active |
Driver Installation
This LCD Module need install driver first.
Step 1:Download the Raspbian IMG
https://www.raspberrypi.org/downloads/raspbian/
Step 2: Burn the system image
If you don't know how to do that,you can refer to the Raspberry Pi office tutorial
Step 3: Open terminal(SSH) and install the driver on RaspberryPi
(tested on RaspberryPi 3B+,3B,2B,2B+,1B,ZERO)
Run:
git clone https://github.com/waveshare/LCD-show.git
chmod -R 755 LCD-show
cd LCD-show/
sudo ./LCD35-show
Wait A Few Minutes, when the system reboot ok, you can see that. Use PWM to control backlight brightness
gpio -g pwm 18 1024
gpio -g mode 18 pwm
gpio pwmc 1000
gpio -g pwm 18 X
Touch screen calibration
- This LCD can be calibrated using a program called xinput_calibrator
- Install it with the commands:
cd LCD-show/

sudo dpkg -i -B xinput-calibrator_0.7.5-1_armhf.deb
- Click the Men button on the task bar, choose Preference -> Calibrate Touchscreen.
- Finish the touch calibration following the prompts. Maybe rebooting is required to make calibration active.
- You can create a 99-calibration.conf file to save the touch parameters (not necessary if file exists).
/ect/X11/xorg.conf.d/99-calibration.conf
- Save the touch parameters (may differ depending on LCD) to 99-calibration.conf, as shown in the picture:
Download Resources
- Document
- How_to_install_the_LCD_driver_V1.2
- How_to_install_matchbox-keyboard
- How_to_calibrate_the_resistance_touch_screen-V1.2
- How_to_use_Raspberry_Pi(Download,Format,Burn,SSH,PuTTy)-V1.0.pdf
- How_to_change_display_direction-GPIO-Resistive_Touch-V1.2
- MPI3501-3.5inch-RPi-Display-User-Manual-V1.0
- Driver download
- download::LCD-show.tar.gz
- Images download
- If you have difficulty installing the driver, or if you still can't use the display properly after installing the driver,
- Please Try our Configned images for tested.
- Just need download and write the image into the TF card. DO NOT need any driver installation steps.
| Image Name | Version | Support | Password | Download | |
|---|---|---|---|---|---|
| Raspbian | 2018-11-13 | PI3B+/A/A+/B/B+/PI2/
PI3/ZERO/ZERO W |
user:pi
password:raspberry |
MPI3501-Raspbian-20181113.7z | |
| MPI3501-Raspbian-20181113.7z | |||||
| Ubuntu | Mate:16.04 | PI3,PI2 | user:pi
password:raspberry |
3.5inch-RPI3-RPI2-ubuntu-mate-16.04-beta2.7z | |
| 3.5inch-RPI3-RPI2-ubuntu-mate-16.04-beta2.7z | |||||
| Kali-linux | 2018.2,nexmon | PI3B+,PI3,PI2 | user:root
password:toor |
3.5inch-MPI3501-kali-linux-2018.2-rpi3B+-nexmon | |
| 3.5inch-MPI3501-kali-linux-2018.2-rpi3B+-nexmon | |||||
- MD5 of Image
- Software


