|
|
| Line 34: |
Line 34: |
| *Dimensions: 164.9 * 124.27 (mm) | | *Dimensions: 164.9 * 124.27 (mm) |
| *Weight: 380 (g) | | *Weight: 380 (g) |
| *Power: 0.74A*5V | | *Power Dissipation: 0.74A*5V |
|
| |
|
| == <font color="blue">Hardware Description</font> == | | == <font color="blue">Hardware Description</font> == |
Revision as of 18:44, 3 December 2018
<tabber>
Description=
Product pictures
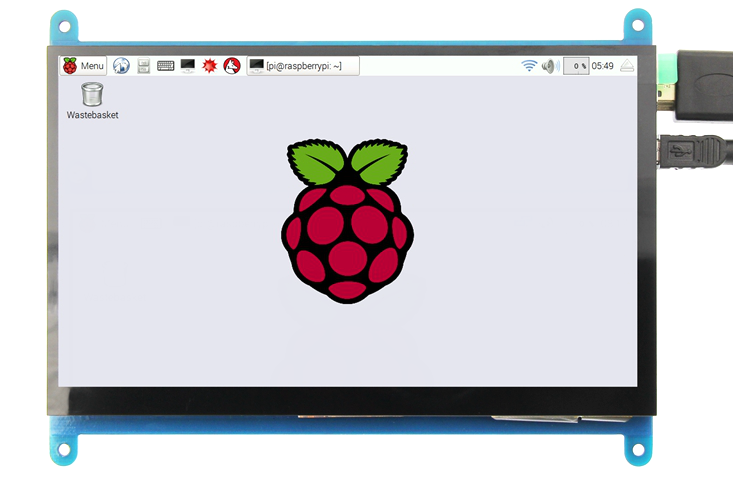
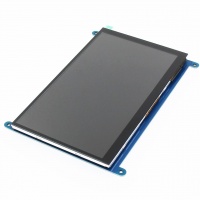
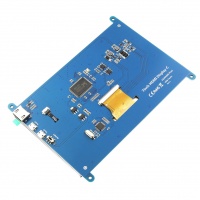
Product description
- 7" standard display, 800 × 480 Hardware resolution, Up to 1920x1080 software configuration resolution.
- Capacitive touch screen, maximum support 5 point touch
- Support backlight control alone, the backlight can be turned off to save power
- Support Raspberry Pi, BB Black, Banana Pi and other mainstream mini PC
- Can be used as general-purpose-use HDMI monitor, for example: connect with a computer HDMI as the sub-display
- Used as a raspberry pi display that supports Raspbian, Ubuntu, Kali-Linux, Kodi, win10 IOT, single-touch, free drive
- Work as a PC monitor, support win7, win8, win10 system 5 point touch (XP and older version system: single-point touch), free drive
- CE, RoHS certification
Product Parameters
- Size: 7.0 (inch)
- SKU: MPI7001
- Resolution: 800 × 480 (dots)
- Touch: five-point capacitive touch
- Dimensions: 164.9 * 124.27 (mm)
- Weight: 380 (g)
- Power Dissipation: 0.74A*5V
Hardware Description
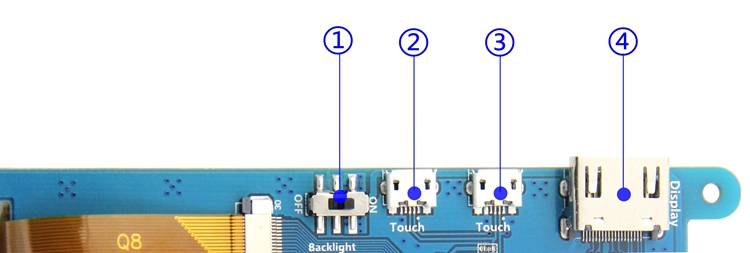
- ① Backlight Power switch: Controls the backlight turned on and off to save power.
- ②&③ USB Touch / power supply connector: For power supply and touch output, the functions of the both are the same, can just use one of them.
- ④ HDMI interface: For connecting motherboard and LCD monitor to HDMI transmission.
How to use with Raspbian/Ubuntu Mate/Win10 IoT Core System
Step 1, Install Raspbian official image
- Download the latest image from the official download.
- Install the system according to the official tutorial steps.
Step 2, modify the “config.txt”
After the programming of Step1 is completed, open the config.txt file of TF card root directory and
add the following code at the end of the file, save and eject Micro SD Card safely:
max_usb_current=1
hdmi_force_hotplug=1
config_hdmi_boost=7
hdmi_group=2
hdmi_mode=1
hdmi_mode=87
hdmi_drive=1
hdmi_cvt 800 480 60 6 0 0 0
Step 3, Drive the 5inch HDMI Display-B with the Raspberry Pi
Insert the TF Card to Raspberry Pi, connect the Raspberry Pi and LCD by HDMI cable; connect USB cable to one of the four USB ports of Raspberry Pi, and connect the other end of the USB cable to the USB port of the LCD; then supply power to Raspberry Pi; after that if the display and touch both are OK, it means drive successfully (please use the full 2A for power supply).
How to use as PC monitor
- Connect the computer HDMI output signal to the LCD HDMI interface by using the HDMI cable
- Connect the LCD's USB Touch interface (Either of the two MicroUSB) to the USB port of the device
- If there are several monitors, please unplug other monitor connectors first, and use LCD as the only monitor for testing.
How to modify the display orientation
Resource
- 7inch_HDMI_Display-B_User_Manual(En)
- How_to_install_the_LCD_driver_V1.2
- How_to_install_matchbox-keyboard
- How_to_calibrate_the_Capacitive_Touch_Screen-V1.0
- How_to_use_Raspberry_Pi(Download,Format,Burn,SSH,PuTTy)-V1.0.pdf
- Product Dimensions:MPI7001_Product_Dimensions
- Local download: LCD-show.tar.gz
- If you have difficulty installing the driver, or if you still can't use the display properly after installing the driver,
- Please Try our Configned images for tested.
- Just need download and write the image into the TF card. DO NOT need any driver installation steps.
- Panasonic SDFormatter
- Win32DiskImager
- PuTTY
BACK TO TOP
|-|
FAQ=
|
Question: Using the Raspberry Pi image provided by the CD/net disk, cannot use the LCD normally.
|
|
Answer:
|
- Confirm that the hardware connection is correct and the contact is good.
- Determine whether TF card is normal and whether the system is started normally.
- The PWR lamp is always bright when the Raspberry Pi is started, and the ACT light is flashing.If you find both lights on,
it may be the TF card does not successfully burn the image file,or that the TF card is not in contact with the Raspberry Pi.
- Recommend using 5V 2A power adapter to power the Raspberry Pi.
- If you use a computer USB interface, you may not be able to activate the Raspberry Pi due to insufficient power supply.
|
|
| Question: What is the reason for the LCD not displayed using the image provided by the Raspberry Pi official?
|
|
Answer:
|
- LCD needs to be installed driver to display correctly, please refer to "How to install the LCD driver (En)" related documentation.
- It is recommended to use the image file provided by us first to test. After the test is passed, use the image file of Raspberry Pi official and installed the driver.
|
|
| Question: How to switch back to traditional monitor for display?
|
|
Answer:
|
- Please refer to "How to install the LCD driver (En)" related instruction document, and use the following command:
sudo ./LCD-hdmi
|
|
| Question: Why the LCD works but flickers?
|
|
Answer:
|
- This problem is likely due to insufficient power supply.
- If you are using the Raspberry Pi, please use the power supply of 5V full 2A to power the Raspberry Pi,
and connect the Raspberry Pi and the LCD by the short USB cable we provided.
- If it is used as a computer monitor, do not use poor quality USB cable or extension cord connection,
do not receive extend the USB port to get electricity, please use the USB cable we provided.
|
|
| Question: Why the Raspberry Pi unable to work properly after updating the Raspbian system??
|
|
| Question: Why the LCD is connected to the computer HDMI, but cannot be displayed normally?
|
|
Answer:
|
| Make sure the HDMI interface of the computer can be output normally.
The computer only connects to the LCD as a display device, and does not connect to other monitors (unplug other monitors).
Connect the USB first, then the HDMI.
Try to restart your computer.
You must use the Windows operating system.
|
|
| Question: How to turn on the Bluetooth function on the Raspberry Pi?
|
|
| Question: Why unable to display full screen or incomplete when using 5”, 5”-B, 7”-B, or 7”-C HDMI screen?
|
|
|-|
after-sales=
Contact us:
Tech Support:
Dear Customers:
There might be a delay of several hours in handling your question, depending on the time difference between your location and ours.
Sincerely hoping your understanding!
Our working time:
08:00-18:00 (Monday to Saturday)
</tabber>


