More actions
No edit summary |
No edit summary |
||
| Line 7: | Line 7: | ||
[[File:7-S-10-2.jpg|300px]] | [[File:7-S-10-2.jpg|300px]] | ||
==<font color="blue"> Working with Raspberry Pi </font> == | |||
1. Download the latest Raspbian image from the official directory and follow the official tutorial steps to install the system. | |||
2. Open the config.txt file in the root directory of Micro SD card and add the following code at the end of the file, save and exit the Micro SD card: | |||
{{code|1= | {{code|1= | ||
hdmi_force_edid_audio=1 | hdmi_force_edid_audio=1 | ||
| Line 19: | Line 20: | ||
hdmi_mode=87 | hdmi_mode=87 | ||
hdmi_drive=2 | hdmi_drive=2 | ||
display_rotate=0 | display_rotate=0 | ||
hdmi_cvt 1024 600 60 6 0 0 0 | hdmi_cvt 1024 600 60 6 0 0 0 | ||
}} | }} | ||
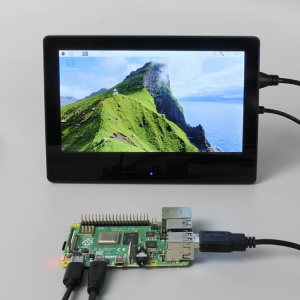
3.Insert Micro SD card, connect the 7inch HDMI Display (S) to Raspberry Pi , connect the power to boot. | |||
==<font color="blue"> Work as HDMI touch monitor</font> == | |||
This product can be used as the HDMI touch monitor of Windows computer, only need to connect HDMI interface and TOUCH interface, can normally display and support up to five points touch. | |||
==<font color="blue"> Product Feature</font> == | |||
* Comprehensive shell care | |||
* This product has stereo speakers and 3.5mm headphone jack, support HDMI audio input, Headset audio output. | |||
* Equipped with buttons to control the System Settings Menu, the functions are as follows: | |||
<font color="red"> | <font color="red"> | ||
* | * Without HDMI signal, the product will be unable to use the System Settings Menu and various shortcuts. | ||
* | * When using the speaker external release function, you need to connect to the POWER interface with an external power supply. Otherwise, it may be caused by insufficient power supply causes display flicker, sound distortion, and even shutdown. </font> | ||
Revision as of 11:31, 23 November 2019
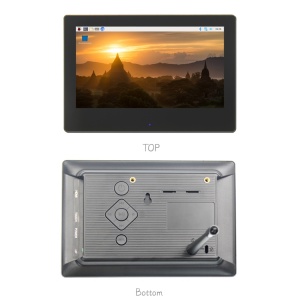
Product Pictures
Working with Raspberry Pi
1. Download the latest Raspbian image from the official directory and follow the official tutorial steps to install the system. 2. Open the config.txt file in the root directory of Micro SD card and add the following code at the end of the file, save and exit the Micro SD card:
hdmi_force_edid_audio=1
max_usb_current=1
hdmi_force_hotplug=1
config_hdmi_boost=7
hdmi_group=2
hdmi_mode=87
hdmi_drive=2
display_rotate=0
hdmi_cvt 1024 600 60 6 0 0 0
3.Insert Micro SD card, connect the 7inch HDMI Display (S) to Raspberry Pi , connect the power to boot.
Work as HDMI touch monitor
This product can be used as the HDMI touch monitor of Windows computer, only need to connect HDMI interface and TOUCH interface, can normally display and support up to five points touch.
Product Feature
- Comprehensive shell care
- This product has stereo speakers and 3.5mm headphone jack, support HDMI audio input, Headset audio output.
- Equipped with buttons to control the System Settings Menu, the functions are as follows:
- Without HDMI signal, the product will be unable to use the System Settings Menu and various shortcuts.
- When using the speaker external release function, you need to connect to the POWER interface with an external power supply. Otherwise, it may be caused by insufficient power supply causes display flicker, sound distortion, and even shutdown.


