Product pictures

Product description
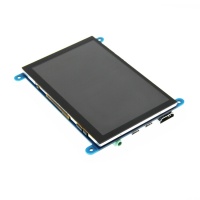
- 5’’ standard display, 800x480 resolution,maximum HDMI resolution 1920X1080 is supported
- Capacitive touch screen, support 5 point touch maximum
- Built-in OSD menu adjustment function (adjustable Contrast/ Brightness/Saturation, etc.)
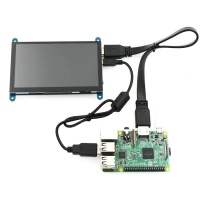
- It is compatible with mainstream mini PC such as Raspberry Pi, BB Black, Banana Pi
- It can also be used as a general-purpose HDMI display, connecting computers, TV boxes, Microsoft Xbox360, SONY PS4, Nintendo Switch and so on
- Used as a Raspberry Pi display that supports Raspbian, Ubuntu, Kodi, Win10 IOT, single-touch, free drive
- Work as a PC monitor, support Win7, Win8, Win10 system 5 point touch (XP and older version system: single-point touch), free drive
- Support HDMI audio output
- CE, RoHS certification
Product Parameters
- Size: 5.0 (inch)
- SKU: MPI5001
- Resolution: 800 × 480 (dots)
- Touch: 5 point capacitive touch
- Audio output: support
- Dimensions: 121.11*95.24(mm)
- Weight: 248 (g)
Hardware Description
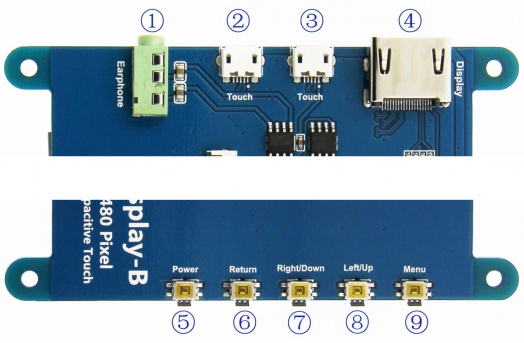
① Earphone: 3.5mm Audio output interface
②&③ Touch: USB connector ( For power supply and touch output, the functions of the both are the same, can just use one of them)
④ Display: HDMI interface ( For connecting motherboard and LCD monitor)
⑤ Power: Controls the backlight turned on and off to save power
⑥ Return: Return (Only valid in the OSD Settings menu)
⑦ Right/Down: Direction Right/Down (Backlight shortcut key)
⑧ Left/Up: Direction Left/Up (Backlight shortcut key)
⑨ Menu: Open the OSD / Select key (Only valid in the OSD Settings menu)
How to use with Raspbian/Ubuntu Mate/Win10 IoT Core System
Step 1, Install Raspbian official image
- Download the latest image from the official download.
- Install the system according to the official tutorial steps.
Step 2, modify the “config.txt”
- After the programming of Step1 is completed, open the config.txt file of TF card root directory and
- add the following code at the end of the file, save and eject Micro SD Card safely:
max_usb_current=1
hdmi_force_hotplug=1
config_hdmi_boost=7
hdmi_group=2
hdmi_mode=1
hdmi_mode=87
hdmi_drive=1
hdmi_cvt 800 480 60 6 0 0 0
Step 3, Drive the 5inch HDMI Display-B with the Raspberry Pi
- Insert the TF Card to Raspberry Pi, connect the Raspberry Pi and LCD by HDMI cable; connect USB cable to one of the four USB ports of Raspberry Pi,
- and connect the other end of the USB cable to the USB port of the LCD; then supply power to Raspberry Pi;
- after that if the display and touch both are OK, it means drive successfully (please use the full 2A for power supply).
How to use as PC monitor
- Connect the computer HDMI output signal to the LCD HDMI interface by using the HDMI cable
- Connect the LCD's USB Touch interface (Either of the two MicroUSB) to the USB port of the device
- If there are several monitors, please unplug other monitor connectors first, and use LCD as the only monitor for testing.
Product Dimensions
How to modify the display orientation
Resouce
- 5inch_HDMI_Display-B_UserManual.pdf
- How_to_install_the_LCD_driver_V1.2
- How_to_install_matchbox-keyboard
- Local download: LCD-show.tar.gz
- If you have difficulty installing the driver, or if you still can't use the display properly after installing the driver,
- Please Try our Configned images for tested.
- Just need download and write the image into the TF card. DO NOT need any driver installation steps.
- Panasonic SDFormatter
- Win32DiskImager
- PuTTY
BACK TO TOP
Contact us:
Tech Support:
Dear Customers:
There might be a delay of several hours in handling your question, depending on the time difference between your location and ours.
Sincerely hoping your understanding!
Our working time:
08:00-18:00 (Monday to Saturday)


